Note: JSPM tool was introduced in NW 7.0
In order to apply the Support Package Stack in NW 2004, you need upgrade each Usage type separately in following order:
o SAP Web AS Java
o Enterprise Portal (EP)
o Knowledge Management & Collaboration (KMC)
• Download SPS19 upgrade files from service.sap.com. Naming convention is mentioned separately for each Usage Type.
SP stacks for SAP WEB AS Java 6.40 -->
1. Download latest JCE Policy file from sun.java.com
2. Download below support packages from Service Market Place(www.service.sap.com)
J2EERT
SAPINST
CTRL
J2EERTOS
3. Extract above 4 SAR files using SAPCAR.
4. Then change to directory where sapinst is existed:

5. Run sapinst

6. Select Import Support Package 19 and click on Next

7. Browse for instance profile and select, and then click on Next

8. Give JDK Home directory path and click on Next

9. Give location for JCE Policy Archive and click on Next

10. As we need to update only Java components first,keep default selection and click on Next

11. Sapinst itself will take the PREREQUISITE CHECK XML in this step. Click on Next

12. If you found any conditions does not met like below, check what needs to be adjusted in order to meet the prerequisites.
In this case Soft Resource Limit file descriptors was not met the condition.

13. Check Soft resource limit description size by using ulimit –n.
14. In this case the value is 1024.
15. If needed change the value using ulimit -d
        E.g.: ulimit –d


16. Then click on Next

17. Click on Start


18. Press on Retry button and try again to avoid the error


19. Press on OK button


20. Click on OK

21. Open System info page and check whether Upgrade completed successfully or not.

Updating the Portal Platform:
1. Extract following 4 files using SAPCAR in order to upgrade to sp19
Note: Before uncaring files rename old uncared folders
to avoid over writing.
Portal Platform 6.0_640:
EP6CTRL
EP6TOOLS
EP6PORTAL
SAPINST
2. Then change to following directory and start sapinst

3. Enter Administrator user and password for that user and click on Next

4. When updating SP Stack, the SDM should be in safe mode. And sapinst itself will take care of this.
5. In this step, it will ask whether to stay in Safe mode after applying patches or switch back to Normal mode once upgrade is done.
6. Keep default selection and click on Next

7. Click on Start to start with Portal Upgrade

8. Click on OK button to confirm the portal platform upgrade.

9. Open portal and check whether upgrade completed successfully or not.

Updating the KMC:
1. Extract following 4 files using SAPCAR
Note: Before uncaring files rename old uncared folders to avoid over writing.
CM+COLLABORATION 6.0_640:
EP6KMC
EP6CTRL
EP6TOOLS
SAPINST
2. Change to following directory and start sapinst

3. Enter Administrator user name and password for that user

4. When updating SP Stack, the SDM should be in safe mode. And sapinst itself will take care of this.
5. In this step, it will ask whether to stay in Safe mode after applying patches or switch back to Normal mode once upgrade is done.
6. Keep default selection and click on Next.

7. Click on Start button to start installation


8. If this error occurred then do following things
Check the log in the path mentioned in the error i.e. /tmp/sapinst_instdir/callSdmViaSapinst.log and find which files are not deployed and deploy them in the following way.

9. Set SDM into “integrated” mode

10. Then Start SDM using StartServer.sh

11. Start SDM Gui

12. Deploy all sda files which were not deployed using sapinst. For this find log file in following location: /tmp/sapinst_instdir/CallSdmViaSapinst.log
13. During the deployment of “com.sap.netweaver.bc.db.sda” file, errors may occur. To deploy this file, follow below steps

14. Before deploying “com.sap.netweaver.bc.db.sda” execute following sql script which will be found in “978042” to alter the tables and indexes.


15. Then try to deploy the file from SDM
16. After Deploying all files manually through SDM , logout from SDM and stop sdm server using StopServer.sh

17. Again set SDM into “Standalone” mode

18. Now press “Retry” in Sapinst
19. After completion of applying SPS open portal and check the updated version information is reflected in portal or not.

20. Check in Systeminfo to check the current patch level:

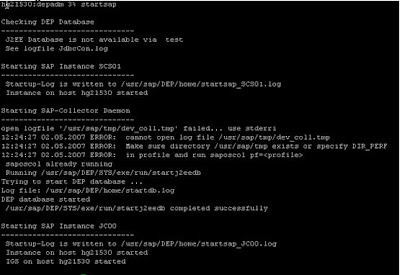
21. Once the update completed then start and stop sap system.

No comments:
Post a Comment